
Business & Tech Essentials
How to Add Vendor Name in Vendor Ledger Entries in Business Central
Welcome to another class of Dynamics 365 Business Central.
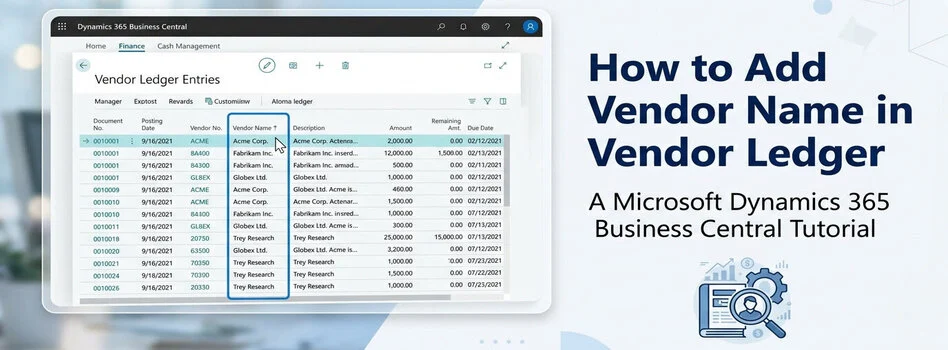
Today, I will show you how to add vendor name in vendor ledger entries in Business Central. Many users work with vendor transactions daily, but when they open Vendor Ledger Entries, they only see vendor numbers instead of actual names.
This creates unnecessary searching because you have to open vendor cards repeatedly just to confirm transactions. In this class, I will walk you through the complete process from page personalization to setup configuration so you can fix this issue correctly. Stay with me till the end because there is one small setup many people miss, and that is exactly why vendor names remain blank.
What You Will Learn
- Add Vendor Name column manually
- Personalize Vendor Ledger Entries page
- Enable vendor names for entries
- Solve blank Vendor Name problem
- Review vendor transactions faster
Before We Start
Before following this class, check these requirements.
- Access to Business Central personalization
- Permission to customize pages
- Access to Purchases and Payables Setup
- Business Manager role recommended
Now let's start.
Step By Step Guide to Add Vendor Name
Watch the complete class below and follow each step with me inside your own environment.
Quick Setup Summary
|
Step |
Action |
|---|---|
|
1 |
Open Profile Roles |
|
2 |
Select Business Manager |
|
3 |
Open Customize Pages |
|
4 |
Open Vendor Ledger Entries |
|
5 |
Add Vendor Name field |
|
6 |
Enable Copy Vendor Name to Entries |
|
7 |
Verify vendor names |
Step 1 Search Profile Roles
First, use the search icon.
Search: Profile Roles
After opening Profile Roles:
- Find your active role
- Locate Business Manager profile
- Open the profile card
This profile normally provides enough permissions for page customization.
Step 2 Open Customize Pages
Inside Business Manager:
- Select Customize Pages
- Wait for Business Central to open a new browser session
- Continue in customization mode
This separate window is where we personalize pages.
Step 3 Open Vendor Ledger Entries
Inside customization mode:
- Search Vendor Ledger Entries
- Open the page
- Review available page fields
At this point, you are ready to insert the missing field.
Step 4 Add Vendor Name Field
Now search for: Vendor Name
Once visible:
- Drag Vendor Name field
- Drop it near Vendor Number column
- Arrange columns based on your preference
- Click Done
After clicking Done:
- Customization saves automatically
- Confirmation popup appears
- Close the customization browser tab
Your page layout update is now completed.
Step 5 Check Vendor Ledger Entries
Open: Vendor Ledger Entries
You will probably notice:
- Vendor Name column appears
- Column position changes successfully
- Vendor names may still be blank
Do not worry.
This is where most users think something failed.
Actually, one setup is still missing.
Step 6 Enable Copy Vendor Name to Entries
Search: Purchases and Payables Setup
Open the page.
Now locate: Copy Vendor Name to Entries
Enable this option.
Why is this important?
Because personalization only displays the field.
This setup controls whether Business Central stores vendor names inside ledger entries.
After enabling:
- Vendor names become available in entries
- Future transactions store names automatically
- Reviews become easier
- Less navigation is required
Step 7 Verify Vendor Names
Return to: Vendor Ledger Entries
Review existing records.
You should now see:
- Vendor Name populated
- Easier transaction identification
- Better readability for finance teams
This small setup saves time during:
- Invoice reviews
- Payment checks
- Vendor reconciliations
- Audit preparation
Common Problems and Quick Fixes
Problem 1: Vendor Name Column Is Blank
Check:
- Copy Vendor Name to Entries enabled
- Personalization saved correctly
- Browser refreshed
Problem 1: Cannot Customize Pages
Verify:
- User permissions
- Role permissions
- Profile access
Problem 2: Vendor Name Field Missing
Try:
- Open customization again
- Search hidden fields carefully
- Refresh Business Central session
Problem 3: Extra Fields You May Add
While customizing Vendor Ledger Entries, I usually recommend reviewing these fields too.
- Remaining Amount
- Due Date
- External Document Number
- Description
- Payment Terms
- Posting Date
Adding related fields together improves readability.
Final Class Notes
Today I showed you how to add vendor name in vendor ledger entries in Business Central using page personalization and Purchases and Payables Setup.
Remember:
- Adding the field alone is not enough
- Copy Vendor Name to Entries must be enabled
- Small personalization changes create better workflows
Try this setup in your environment and you will immediately notice fewer clicks and faster vendor transaction reviews.
See you in the next Dynamics 365 Business Central class.
Disclaimer: All logos, trademarks, and brand names used in this document are the property of their respective owners. Their use here is for identification purposes only and does not imply endorsement.
Recent News

Microsoft SharePoint Deserialization Vulnerabilities: What Organizations Need to Know
15-07-2026
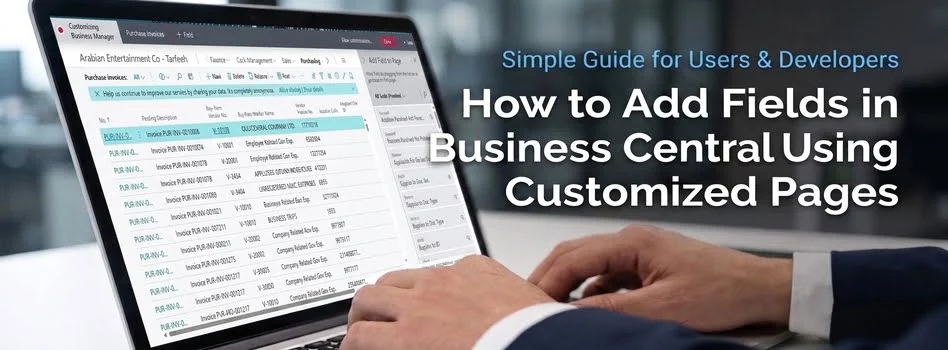
How to Add Fields in Business Central Using Customized Pages
13-07-2026

How to Disable Personalization in Business Central Using Profile Roles
13-07-2026

SACS-210: What’s New for Aramco CCC Compliance
06-07-2026

Saudi PDPL Enforcement Updates & Data Privacy Guidelines
28-06-2026

Cybersecurity Compliance Roadmap CCC: Aramco SACS 002 Submission & Certification in Depth
23-06-2026

How to Access and Navigate SharePoint Sites for Beginners
22-06-2026

Cybersecurity Compliance Roadmap CCC: Aramco SACS 002 Testing and Validation in Depth
15-06-2026

Cybersecurity Compliance Roadmap CCC: Aramco SACS 002 Documentation in Depth
14-06-2026

How to Upload Files and Folders in SharePoint Online
08-06-2026

Your choice regarding cookies on this site
Policy, By Continuing, You are agreeing to Our Terms of Use and Consenting to the above.
Privacy Policy Powered By | ![]()


