Business & Tech Essentials
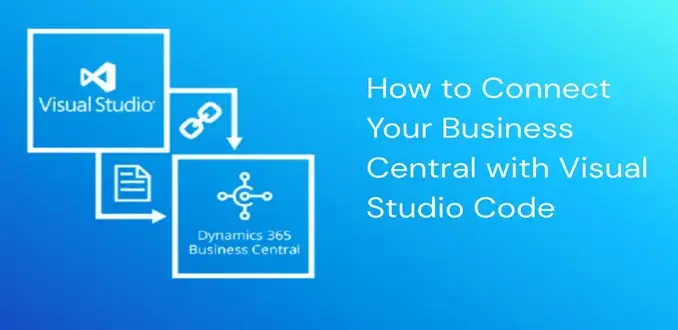
How to Connect Your Business Central with Visual Studio Code
Welcome to our next class on Dynamics 365 Business Central. Today we will learn how to connect Business Central with Visual Studio Code so you can begin developing and customizing extensions using AL language. This lesson is written for developers at all skill levels including beginners, junior developers, system administrators, and learners who want to work with Business Central in a structured development environment using the latest Microsoft development workflow recommended for 2026 and beyond. We will explore the official Microsoft setup steps, including installing the essential AL Language extension, setting up your launch.json and app.json files, and running your first AL code inside Business Central. By the end of this lesson you will also understand how modern AI tools can be used to increase your productivity in AL development.
Before we begin, many businesses ask why this setup is important. In real development projects, you will write AL code inside Visual Studio Code to create custom pages, tables, extensions, fields, and automation workflows. This is the foundation of Business Central development and the starting point of every Dynamics 365 BC project.
If your organization needs help with sandbox configurations, app deployment, or full feature development, our Microsoft Dynamics 365 Solutions team at Out2Sol Global provides complete support from installation to project publishing.
Watch Our Out2Sol Short and Quick Youtube Video
We always start this class by asking our students to watch a short tutorial video.
Here is the same video we used in our training session
Watching it once will make the step-by-step process below easy to follow.
Steps to Connect Visual Studio Code with Business Central
Below are the steps in the same teaching style used in a classroom. Each step is short and clear.
Step 1 Download Visual Studio Code
-
Install Visual Studio Code on your computer
-
Open Visual Studio Code and wait until it loads fully
-
This editor becomes your main workspace for AL development
Step 2 Install AL Language Extension
-
Open the Extensions view in Visual Studio Code
-
Search for the AL Language extension
-
Install the AL Language extension for Microsoft Dynamics 365 Business Central
-
This extension prepares Visual Studio Code for AL coding
Step 3 Open Command Palette
-
Select View inside Visual Studio Code
-
Click Command Palette
-
You will use Command Palette often for AL commands
Step 4 Select AL Go
-
Type AL Go inside the Command Palette
-
Choose AL Go to create a new AL project
-
Visual Studio Code generates a starter folder with sample files
Step 5 Select your wave
-
Choose the wave that matches your Business Central environment
-
In class we select Wave 2
-
Select the same wave used by your sandbox for correct compatibility
Step 6 Choose server
-
You may choose your own server
-
You may choose Microsoft cloud sandbox
-
Learners usually work with cloud sandbox because it is pre configured and stable
Step 7 Copy application ID or URL
-
Open your Business Central application
-
Copy the application ID or URL
-
You will use this value in your project configuration later
Step 8 Edit launch json
-
Open launch json inside the AL project
-
Update these fields
-
name
-
tenant
-
environmentType
-
environmentName
-
startupCompany
-
-
These values guide Visual Studio Code to your Business Central environment
Step 9 Download symbols
-
Open Command Palette again
-
Search for the symbols option
-
Select the command to download symbols from Business Central
-
Symbols allow Visual Studio Code to read pages tables fields and other base objects
Step 10 Update app json
-
Open app json inside your AL project
-
Update the id field
-
Update the name field
-
Update the publisher field
-
These fields identify your extension inside Business Central
Step 11 Copy the sign in link
-
Visual Studio Code shows a link after symbols download
-
Copy the link
-
Open it in your browser
Step 12 Enter the verification code
-
A Microsoft page opens
-
Enter the code that appears inside Visual Studio Code
-
Select next to continue
Step 13 Sign in to Business Central
-
Sign in using your Business Central account
-
Authentication completes when your credentials match the environment
-
This process connects your AL workspace to the server
Step 14 Confirm the developer connection
-
A confirmation page tells you that your developer application is connected
-
Close the page and return to Visual Studio Code
Step 15 Edit the Hello World file
-
Open the HelloWorld al file
-
Change the message from Hello world to Hello to all of Youtube
-
This is your first custom AL message
Step 16 Run without debugging
-
Select Run without debugging
-
The project compiles and publishes to your Business Central sandbox
-
Visual Studio Code opens the Business Central web client when the publish completes
Step 17 View your message inside Business Central
-
A pop up message appears
-
The message displays Hello to all of Youtube
-
Select ok
Step 18 Check your extension list
-
Open the Extensions page inside Business Central
-
Your extension appears in the list
-
This confirms that Business Central is connected to Visual Studio Code successfully
Using AI Tools with Business Central Development in Visual Studio Code
As development practices evolve, 2026 brings new ways to build and maintain Business Central solutions more efficiently. Once you have connected Visual Studio Code with your Business Central sandbox and downloaded the required symbols, developers can enhance their workflow using AI-enabled tools that integrate directly into VS Code. These tools are designed to assist you with code suggestions, patterns, and project navigation, making AL development faster and less error-prone.
Here are the key AI-enabled tools commonly used in 2026:
GitHub Copilot Integration
GitHub Copilot can be added to VS Code to provide real-time code suggestions and completions while you write AL code. It learns from context and suggests object definitions, function structures, and even comments based on your current workflow. It requires a GitHub Copilot subscription and is best used by developers who understand core AL syntax and Business Central architecture.
AI-Assisted Extensions for Code Recommendations
Several extensions built on AI models can scan your AL files and suggest improvements, refactoring opportunities, or help you catch potential issues early. These tools work alongside the AL Language extension from Microsoft and do not replace your expertise. Instead they act as a smarter guide that helps you avoid common mistakes.
Microsoft Foundry and Model Integration
For advanced scenarios, developers can integrate AI models through Microsoft Foundry or related AI platforms to automate certain parts of their development or testing workflows. These models can assist in generating boilerplate code, offering test suggestions, or preparing documentation based on your project files.
Accessing AI Tools Within the VS Code Workflow
All AI enhancements are made available through the Command Palette (Ctrl + Shift + P) or dedicated sidebars within Visual Studio Code. After you set up your project using the steps earlier in this class (refer to the setup steps), you can invoke AI-related commands alongside traditional AL commands like AL: Go! or Download Symbols.
Why This Matters in 2026
The integration of AI tools into the Business Central development cycle means:
• You spend less time on repetitive tasks
• You reduce syntax and structural errors
• You gain contextual code guidance
• You can focus more on business logic and customization
AI tools do not replace developer expertise but improve efficiency. Using AI appropriately allows you to produce higher-quality AL code and maintain Business Central solutions more effectively in 2026.
Important Notes for Learners
These files are used in every AL project
-
launch json
-
app json
Launch json controls
-
tenant
-
environment type
-
sandbox name
-
startup company
App json controls
-
extension id
-
extension name
-
publisher name
Symbols help Visual Studio Code recognise
-
standard tables
-
standard pages
-
fields
-
base application objects
If symbols do not download the environment and Visual Studio Code cannot work together.
Visual Studio Code Business Central Setup Advice
Learners commonly face setup interruptions during the first attempt. You can avoid many issues with a steady approach.
-
Always use the correct wave version
-
Keep your tenant value accurate
-
Use a stable internet connection
-
Use the AL extension version that matches your Business Central build
-
If you use a sandbox created recently wait for a few minutes before downloading symbols
-
Never copy values from another student because tenant values must match your own account
Troubleshooting Common Issues
Here are frequent issues students face in labs.
Symbols do not download
-
Wave does not match server version
-
Sandbox version recently updated
-
Tenant value incorrect
-
AL Language extension not updated
Publishing fails
-
Incorrect environment type in launch json
-
Outdated AL extension
-
Incomplete authentication
Login issues
-
Wrong account
-
Multi factor prompt not completed
-
Cached credentials expired
Why This Setup Matters
A working Visual Studio Code and Business Central connection supports practical development. All AL code is created and tested inside this environment. You use it for
-
pages
-
tables
-
fields
-
automation steps
-
small extensions
-
custom calculations
This early setup builds the confidence needed for advanced tasks. A clean sandbox environment helps learners experiment safely before touching live data.
Final Notes for Students
After completing this lesson try these small tasks to build confidence
-
create a second AL project with a new name
-
change the message text in each project
-
test symbol download again
-
explore the objects inside the base application through Visual Studio Code
-
publish your project again and observe the change in the Extensions list
Using these tasks your learning path becomes clear. Learners continue to grow through consistent practice. For teams working with Microsoft Dynamics 365 solutions this foundation prepares the structure needed for future customisation work.
Recent News

Saudi PDPL Data Privacy Guidelines & Enforcement Updates 2026
23-02-2026
How to Create a Timeline in Power BI
14-02-2026
Cyber Security Awareness and Compliance Guide for Organizations
07-02-2026
Microsoft PBVIZ Files: How to Import and Use Custom Power BI Visuals
21-01-2026
How to Extract SAP Data Using APIs and OData for Power BI Reporting
13-01-2026

About Loyalty Program and 6 Proven Strategies for Long-Term Growth in 2026
07-01-2026
ZATCA E-Invoicing Phase 2 Integration Explained
30-12-2025
How to Add Members to a SharePoint Group
29-12-2025
How to Create Department and Sub-Department in SharePoint
23-11-2025
The Unseen Web Pillar Cloudflare Failure and Global Impact
17-11-2025


