Business & Tech Essentials
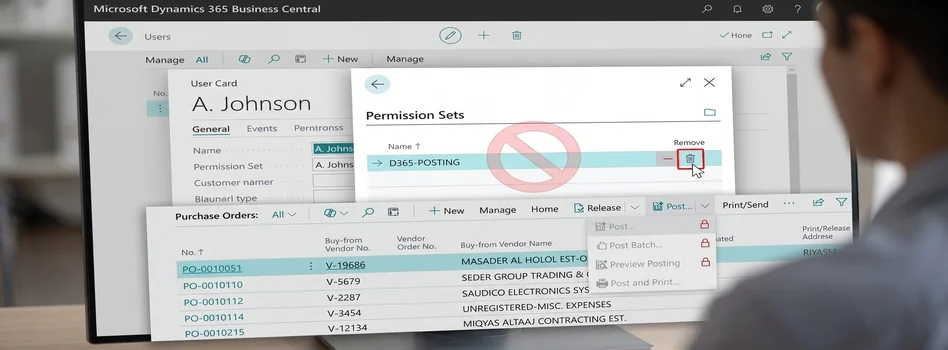
How to Remove or Hide Posting Rights for Users in Dynamics 365 Business Central
Today, we will look at how you can remove or hide posting options for users in Dynamics 365 Business Central. This can be useful when users need to create or work with purchase documents but should not have access to posting actions.
In Business Central, controlling what users can do is important for maintaining a clear and secure workflow. In this example, we will use the Personalize option to hide posting actions from the user interface.
If you need help managing Business Central permissions, user roles, or posting controls, Out2sol, as a leading Microsoft Dynamics 365 consulting firm can help you configure your Business Central environment according to your business requirements.
What Does Removing Posting Options Mean?
When we hide posting actions through personalization, the posting buttons are removed from the user's page view.
This approach is useful when you want to simplify the interface for a particular user. However, hiding a button through personalization should not be treated as a replacement for proper Business Central permission management when you need to enforce posting restrictions at the security level.
Steps to Hide Posting Options in Business Central
Watch this quick video to follow the complete process:
Step 1: Open the User Account
First, sign in to the Business Central user account.
Open the Purchase Order or the page where you want to remove the posting options.
Then:
- Select Settings.
- Click Personalize.
Step 2: Hide the Posting Options
In personalization mode, find the posting actions you want to remove.
You can hide options such as:
- Post
- Post & Print
- Post Batch
Remove these actions from the page according to your requirement.
Step 3: Hide Posting Actions
Next, open:
Action → Posting
From here, hide the required posting actions, including Post, Post & Print, and Post Batch.
Step 4: Check the Purchase Order Page
Go back to the Purchase Order page and check the available actions.
The posting options you selected should no longer be visible to the user.
Step 5: Apply the Same Setup to Purchase Invoices
Now open the Purchase Invoice page.
Use the personalization option again and hide:
- Post
- Post & Print
- Post Batch
This helps keep the user interface consistent across purchase documents.
Step 6: Check the Purchase Invoice List
You should also check the Purchase Invoice list.
Open the actions and hide the posting options that you do not want the user to see.
Step 7: Check the Purchase Invoice Document Page
Finally, open an individual Purchase Invoice and verify the posting actions.
Hide Post, Post & Print, and Post Batch where required.
Why Hide Posting Options?
Removing unnecessary posting actions can make the Business Central interface easier to manage for users who are responsible for preparing documents but should not normally perform posting activities.
It can help you:
- Keep the user interface simple
- Reduce accidental posting
- Separate document preparation from posting activities
- Make the workflow easier for different users
Important Note
There is an important difference between hiding a posting button and removing posting permissions.
Personalization changes what the user sees on the page. If your requirement is to technically prevent a user from posting transactions, you should review their permission sets and user setup as part of the security configuration.
Final Thoughts
Managing posting actions is one small but useful part of controlling how users work in Business Central. By hiding unnecessary posting options, we can create a cleaner interface and make the responsibilities of different users easier to manage.
For stronger access control, however, always consider the user's permissions and role in addition to the page personalization.
Try the steps above in your Business Central environment and check the Purchase Order and Purchase Invoice pages to make sure the required posting actions are hidden.
See you next time with another Dynamics 365 Business Central topic.
Disclaimer: All logos, trademarks, and brand names used in this document are the property of their respective owners. Their use here is for identification purposes only and does not imply endorsement.
Recent News

How to Do Predictive Analysis in Power BI Desktop
07-08-2026

How to Navigate Department Documents in SharePoint
07-08-2026
Power BI Mobile Application Features and Usage Guide
27-07-2026

ZATCA E-Invoicing Phase 2 Integration Explained
27-07-2026

Saudi Arabia's NCA Cybersecurity Guidelines
27-07-2026
Row-Level Security (RLS) in Power BI
27-07-2026

How to Use Power BI Copilot
20-07-2026

Microsoft SharePoint Deserialization Vulnerabilities: What Organizations Need to Know
15-07-2026
How to Add Fields in Business Central Using Customized Pages
13-07-2026

How to Disable Personalization in Business Central Using Profile Roles
13-07-2026

Your choice regarding cookies on this site
Policy, By Continuing, You are agreeing to Our Terms of Use and Consenting to the above.
Privacy Policy Powered By |