Business & Tech Essentials
How to Set Default Document Line Types in Dynamics 365 Business Central
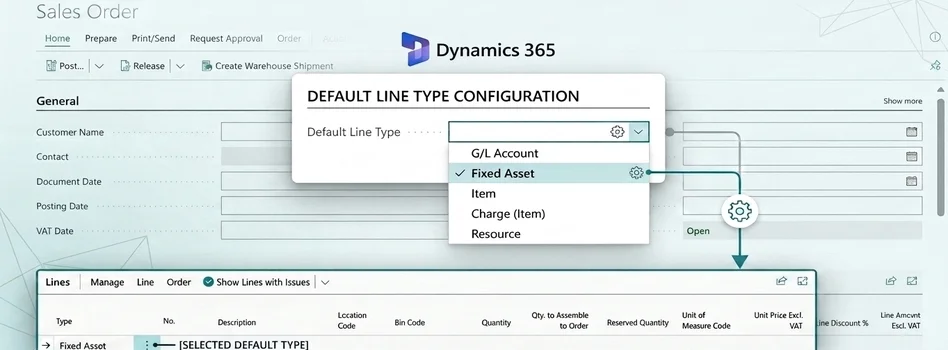
When we create sales or purchase documents in Dynamics 365 Business Central, we may repeatedly select the same line type, such as Item, G/L Account, Resource, or Fixed Asset. Instead of selecting it every time, we can set a default document line type from the relevant setup page.
In this class, we will see how to configure the default line type for both sales and purchase documents.
If you need help implementing, customizing, or optimizing Business Central for your business, Out2sol Global provides Microsoft Dynamics solutions designed around your business processes and reporting requirements.
What Is a Default Document Line Type in Business Central?
The Document Default Line Type determines which type of line Business Central selects automatically when you create a new sales or purchase document.
For example, if your team mostly creates sales lines for Fixed Assets, you can set Fixed Asset as the default. Business Central will then select it automatically instead of requiring the user to choose it manually.
This small configuration can make document entry faster and more consistent.
Set the Default Line Type for Sales Orders
Let's first configure the default value for sales documents.
Step 1: Open Sales & Receivables Setup
- Sign in to Dynamics 365 Business Central.
- Use the Search icon to find Sales & Receivables Setup.
- Open the setup page.
Step 2: Select the Document Default Line Type
Find Document Default Line Type and select the option you want, such as Fixed Asset.
The selected value will be used as the default when creating new sales document lines.
Step 3: Create a Sales Order
Now open a new Sales Order and add a line.
You will see that the line type is automatically populated with the value you selected in the setup.
For example, if you selected Fixed Asset, Business Central will automatically use Fixed Asset as the line type.
Set the Default Line Type for Purchase Orders
We can configure the same behavior for purchase documents.
Step 1: Open Purchases & Payables Setup
- Use the Search icon in Business Central.
- Search for Purchases & Payables Setup.
- Open the setup page.
Step 2: Select the Document Default Line Type
Find Document Default Line Type and select your preferred option.
For example, you can select Fixed Asset if that is the type your purchasing team commonly uses.
Step 3: Create a Purchase Order
Open a new Purchase Order and add a document line.
The selected line type will now appear automatically based on your setup.
Why Use Default Line Types?
Setting a default line type may look like a small configuration, but it can make everyday document entry easier.
It can help us:
- Reduce repetitive selections
- Speed up sales and purchase data entry
- Keep document entry consistent
- Reduce unnecessary user actions
- Make Business Central easier for regular users
For example, if your users create many purchase documents using the same line type, setting a default can save time across hundreds of transactions.
Final Thoughts
The Document Default Line Type setting in Dynamics 365 Business Central is a simple way to improve the document-entry experience. We only need to configure the setting in Sales & Receivables Setup or Purchases & Payables Setup, and Business Central can automatically use that choice when creating new documents.
The important part is to choose the default based on how your team actually works. If users frequently need a different line type, they can still adjust the line manually when required.
See you next time with another Business Central topic.
Disclaimer: All logos, trademarks, and brand names used in this document are the property of their respective owners. Their use here is for identification purposes only and does not imply endorsement.
Recent News
How to Assign Workspace Roles and Permissions in Power BI Service
25-08-2026
How to Create a List Page in Business Central Using AZ AL Dev Tools
19-08-2026
How to Connect Azure SQL Database to Power BI Desktop
19-08-2026

How to Do Predictive Analysis in Power BI Desktop
07-08-2026

How to Navigate Department Documents in SharePoint
07-08-2026
How to Remove or Hide Posting Rights for Users in Dynamics 365 Business Central
07-08-2026
Power BI Mobile Application Features and Usage Guide
27-07-2026

ZATCA E-Invoicing Phase 2 Integration Explained
27-07-2026

Saudi Arabia's NCA Cybersecurity Guidelines
27-07-2026
Row-Level Security (RLS) in Power BI
27-07-2026

Your choice regarding cookies on this site
Policy, By Continuing, You are agreeing to Our Terms of Use and Consenting to the above.
Privacy Policy Powered By |