
Business & Tech Essentials
How to Import Data Using Configuration Packages in D365 Business Central
Welcome to our next class on Microsoft Dynamics 365 Business Central. Today, we will explore one of the most useful tools for data migration and setup, how to import data using business central configuration packages.
In this class, we'll walk through each step carefully so that you can easily understand how to manage, edit, and apply imported data in Business Central. This lesson is especially helpful for accountants, system administrators, and consultants who regularly work with data import tasks in D365.
At Out2Sol, we offer Microsoft Dynamics 365 Services and Solutions designed to streamline your business operations; from D365 implementation and integration to advanced customization and training.
Now, let's get started with our step-by-step guide to importing data using configuration packages in Business Central.
Step-by-Step Guide to Import Data Using Configuration Packages
Watch Our Youtube Video
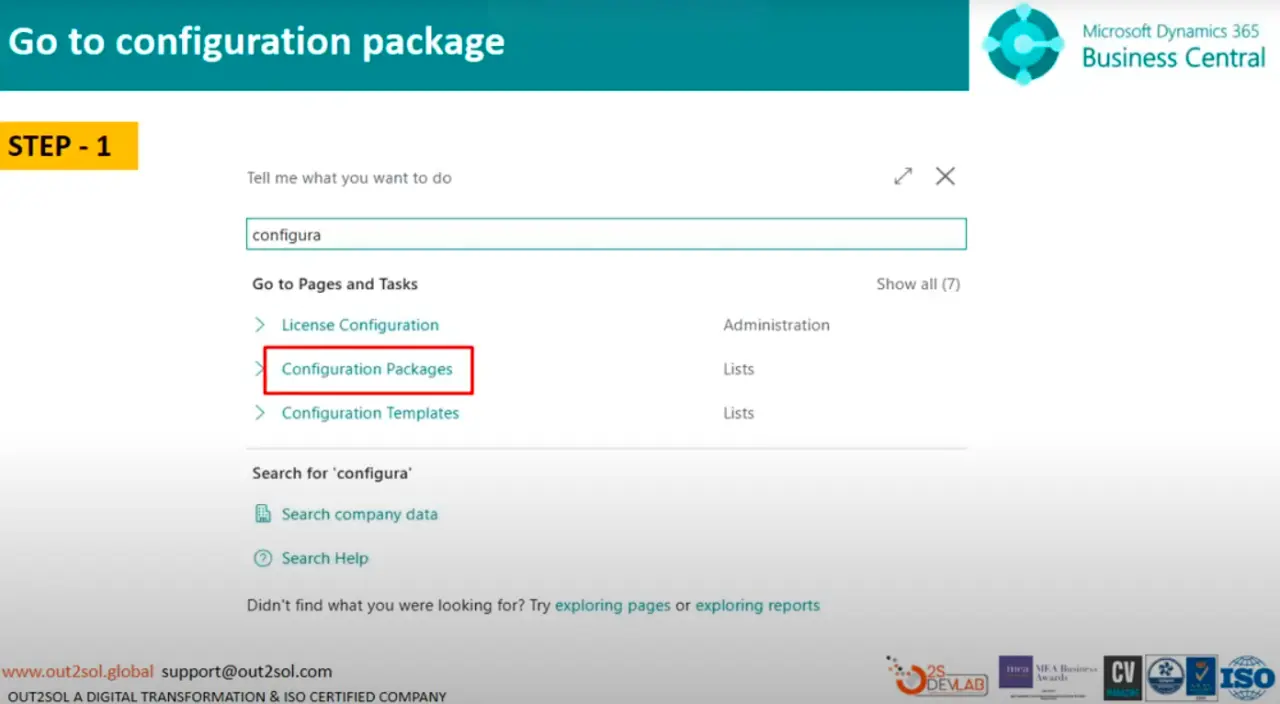
Step 1: Go to Configuration Packages
From the search bar, type Configuration Packages and open the page. This section allows you to create, edit, and manage your data import templates.
Tip: Bookmark this page for quick access in future data import tasks.
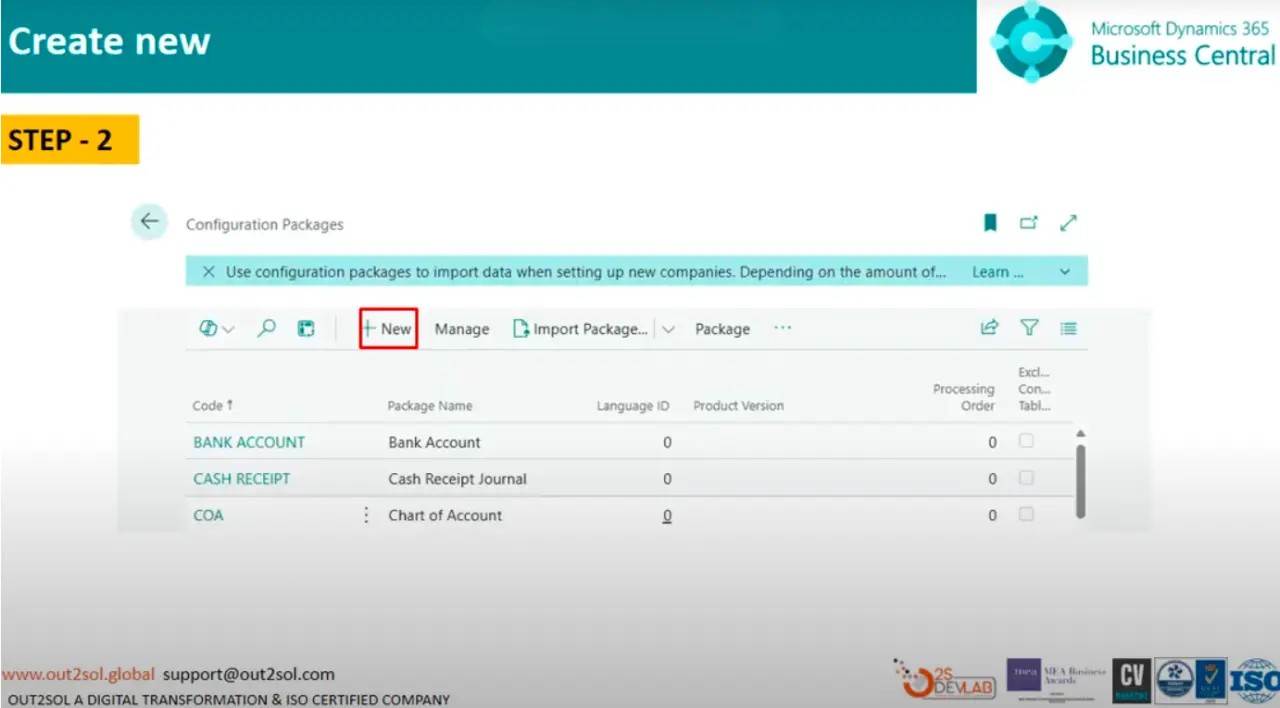
Step 2: Create a New Package
Click on New to create a fresh configuration package.
Tip: Always name your packages clearly, for example, Purchase_Invoice_Import_2025, to avoid confusion later.
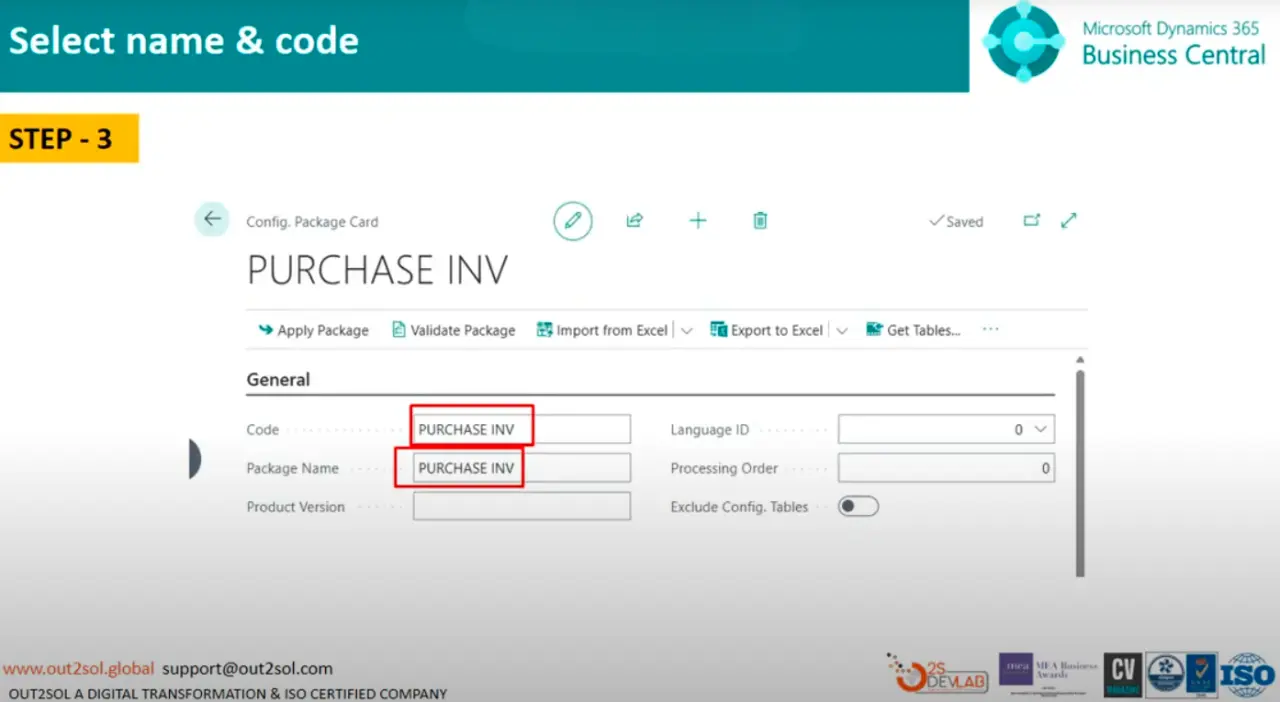
Step 3: Select Code and Package Name
Choose an appropriate Code and Package Name. For this example, we will use Purchase Invoices.
This tells Business Central which area or data type you'll be importing.
Step 4: Select Table ID and Name
In this step, select the Table ID and Table Name.
For our example, choose Purchase Header and Purchase Line.
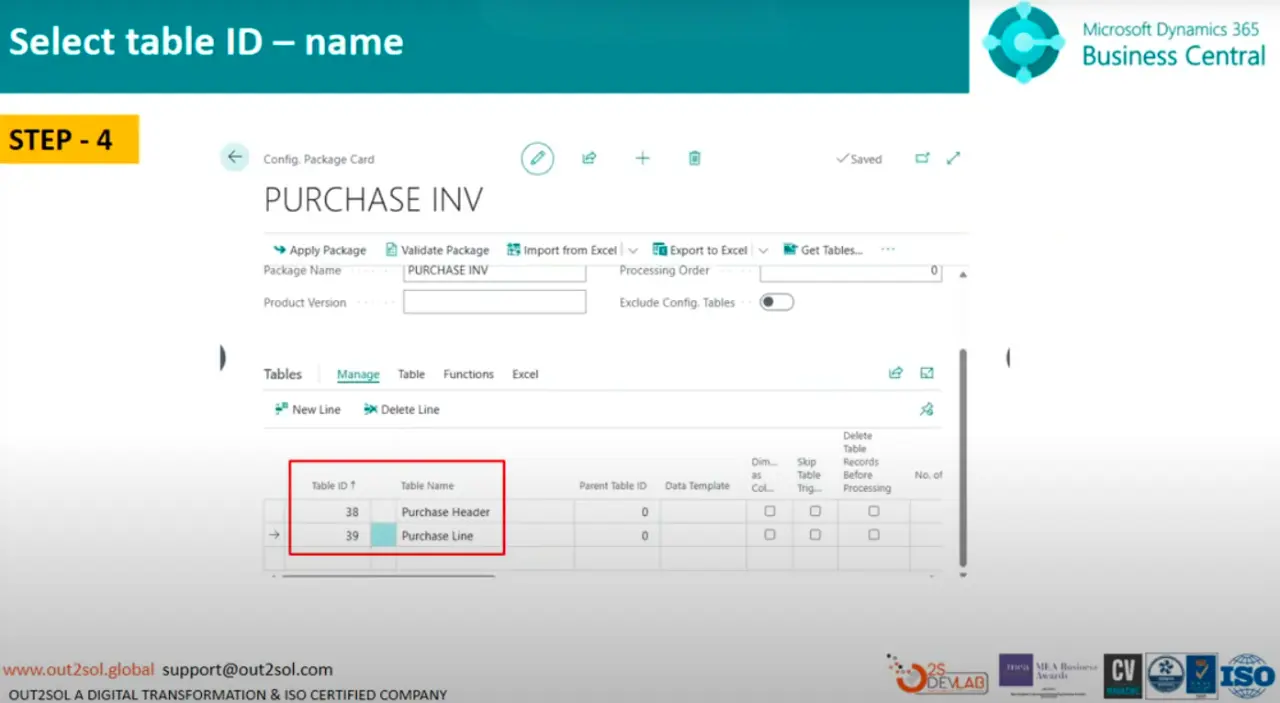
Tip: Always double-check your table selection, incorrect tables may cause import errors or data mismatches.
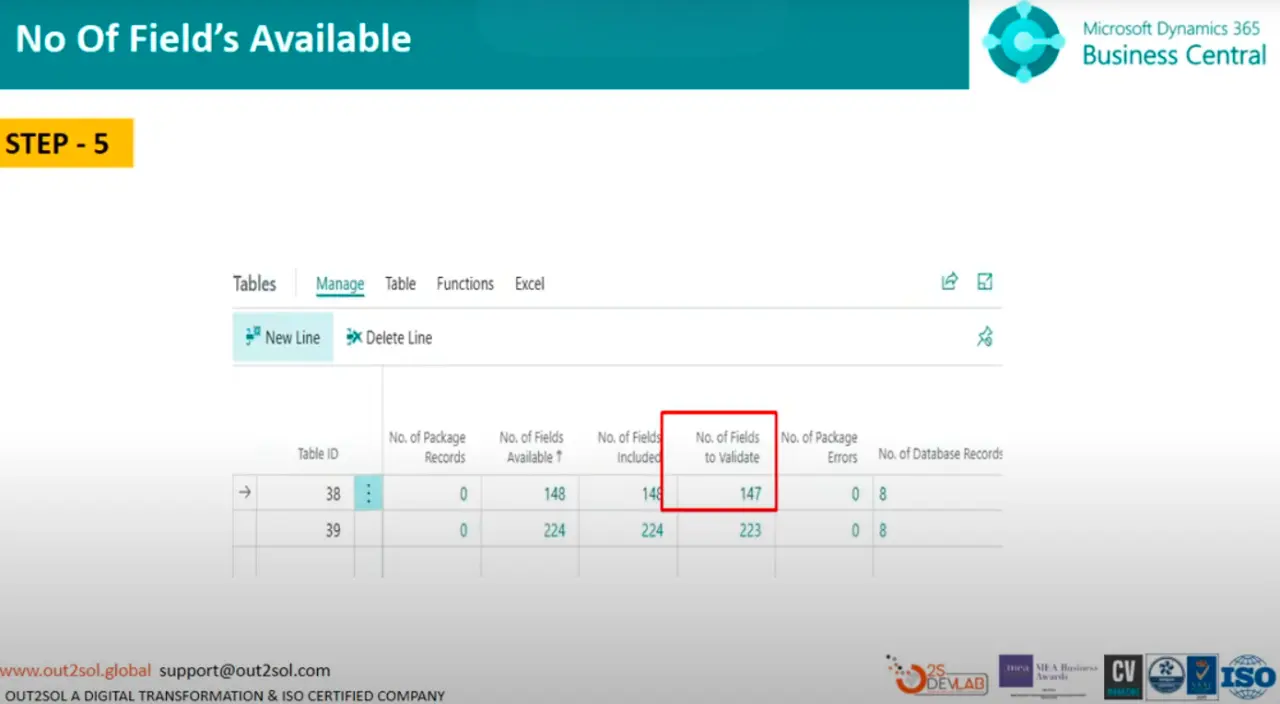
Step 5: Click on Numbers of Fields to Validate
Select No. of Fields to Validate to ensure that the data you're importing matches your table's structure.
This validation step helps prevent data corruption or mapping errors.
Step 6: Select Fields
Click on Fields to review or modify which fields will be included in your import.
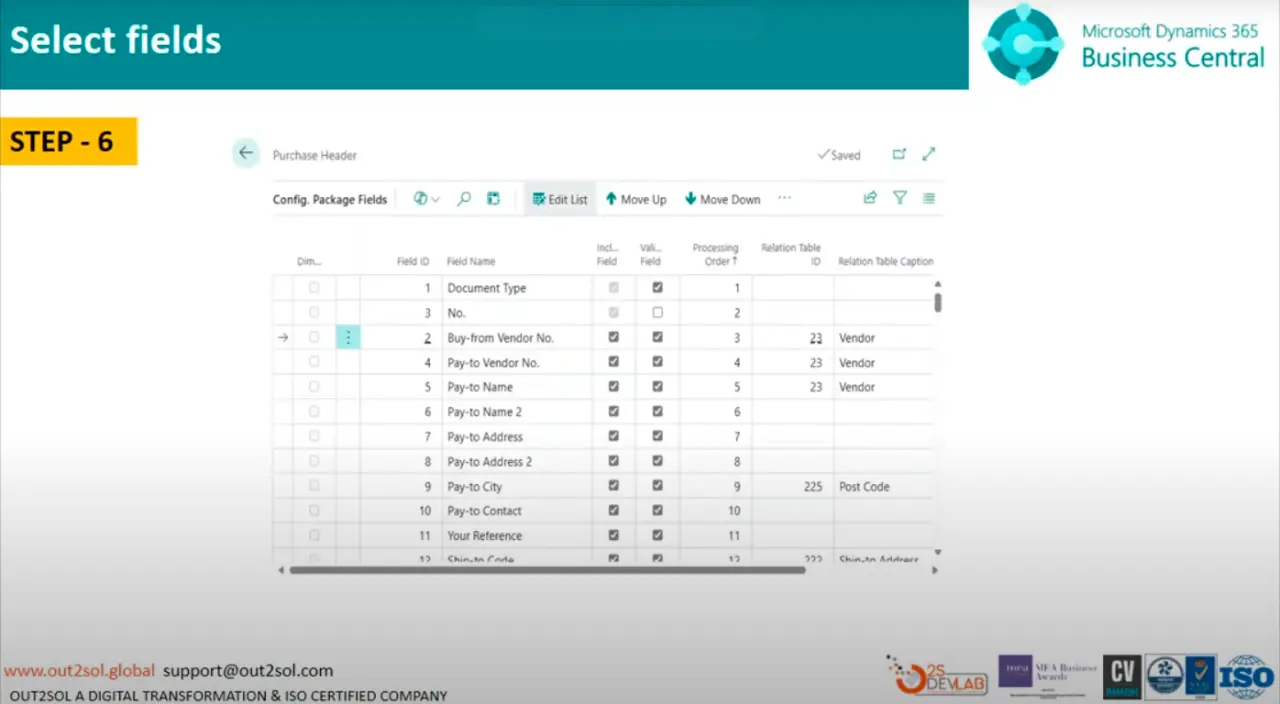
Tip: Import only the necessary fields to keep the data clean and focused.
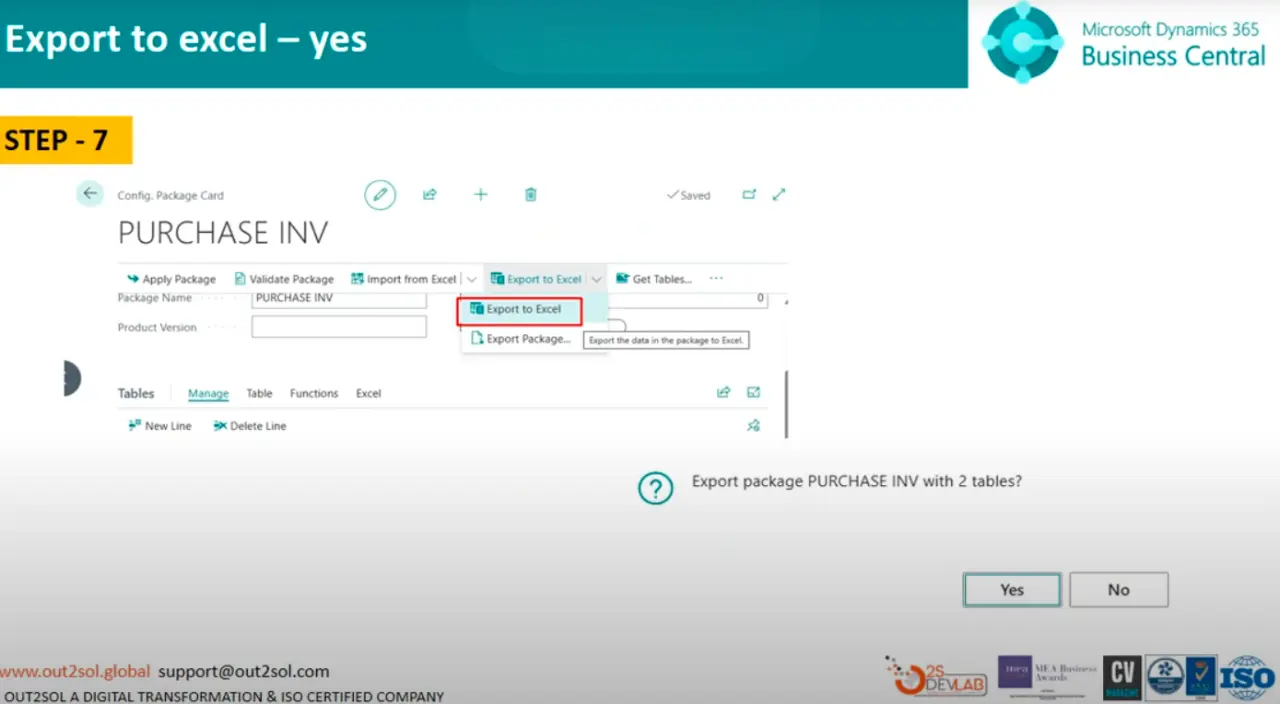
Step 7: Export to Excel
Click Export to Excel. A message will appear:
Export package Purchase Invoice with 2 tables.
Click Yes to proceed.
Business Central will generate an Excel file containing your table structure.
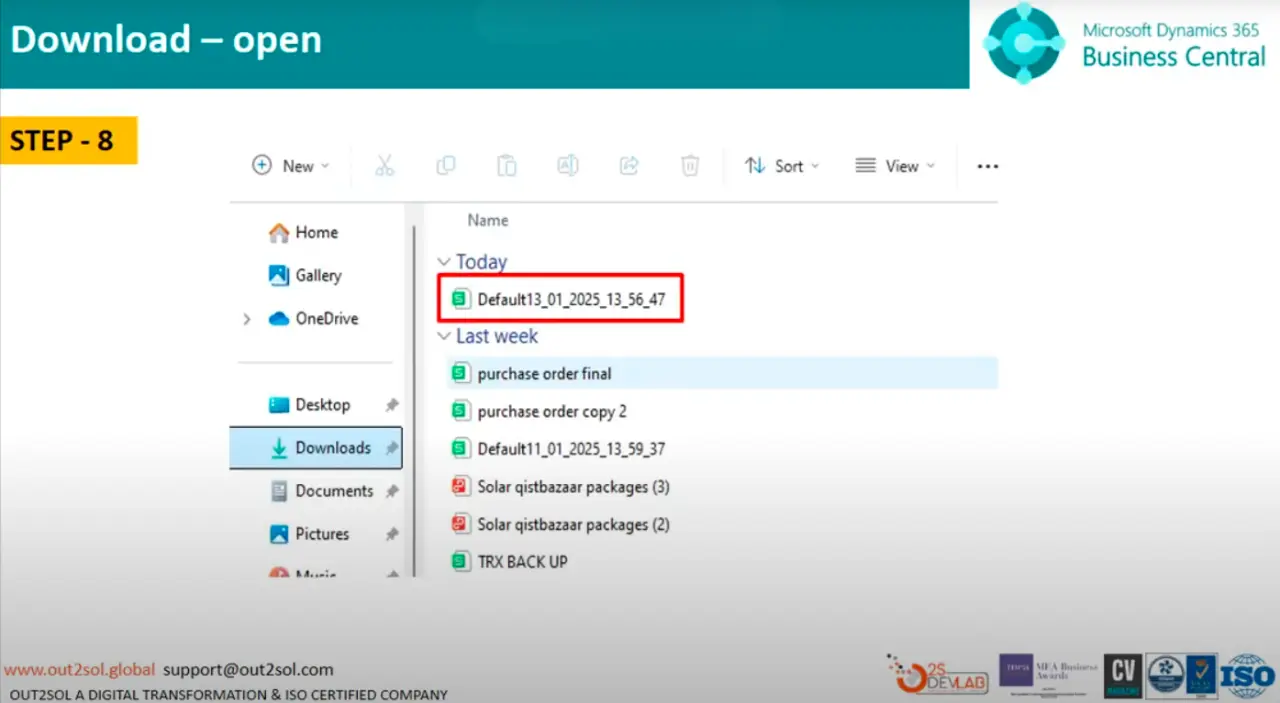
Step 8: Download and Open the Excel File
After downloading, open the Excel file. You'll notice sheets for Purchase Header and Purchase Line — these represent your data structure.
You can now add or modify data in Excel before importing it back into Business Central.
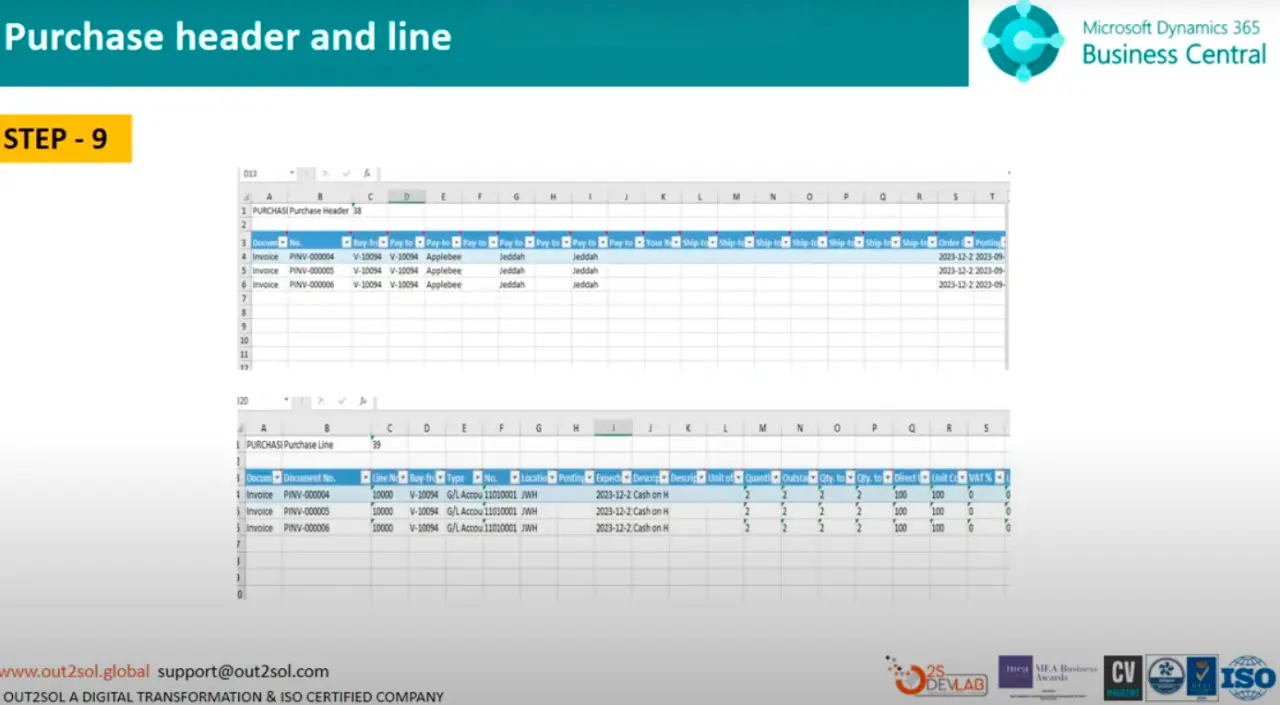
Step 9: Fill Purchase Header and Line Data
Enter the relevant data for your Purchase Header and Purchase Line directly into the Excel file.
Make sure the headers remain unchanged to avoid import issues.
Tip: Keep your data consistent with existing setups (vendor names, item codes, etc.).
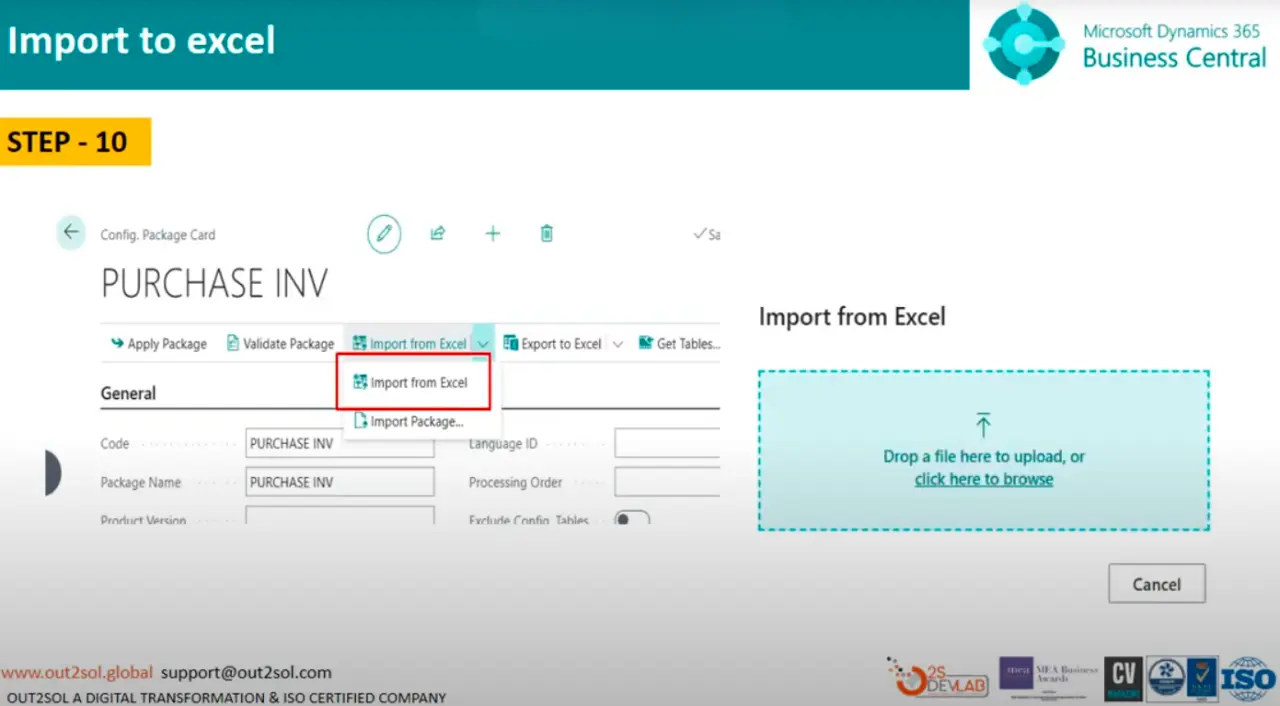
Step 10: Import the File
Once your Excel file is ready, return to Business Central and click on Import from Excel.
Drag and drop your Excel file into the import window.
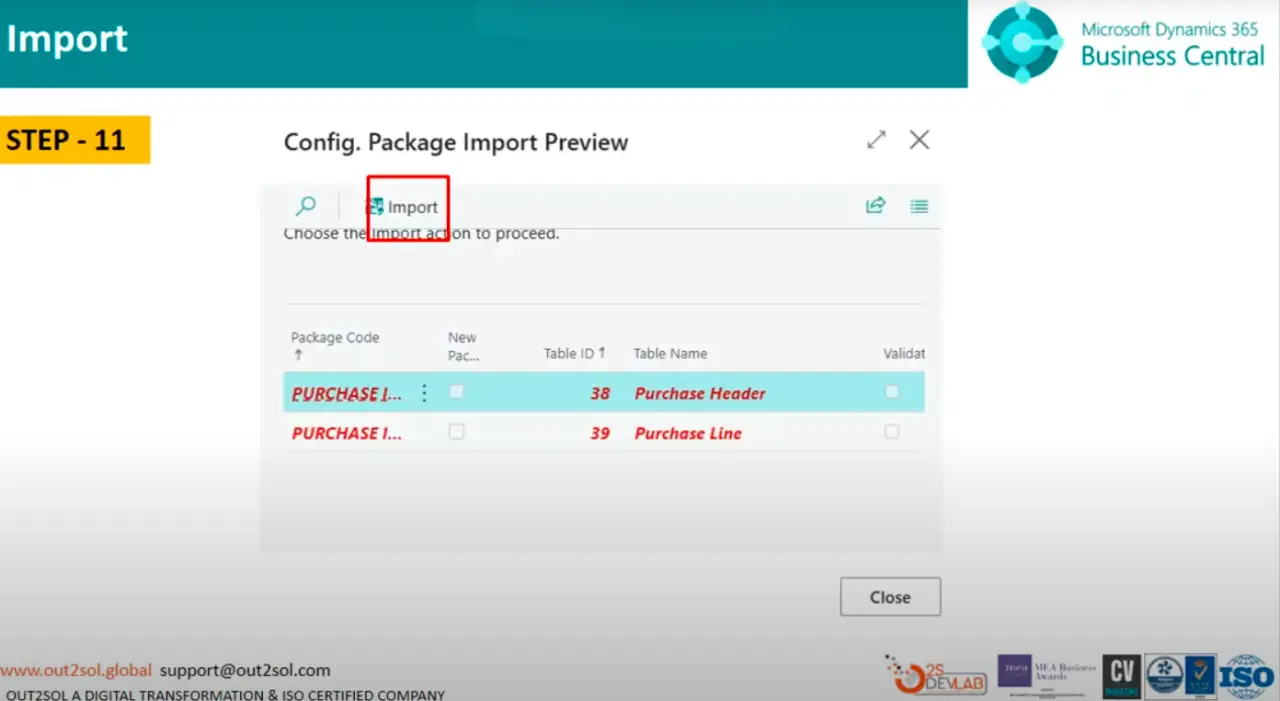
Step 11: Confirm Import
After uploading, click Import. Business Central will process your file and show how many records are ready for application.
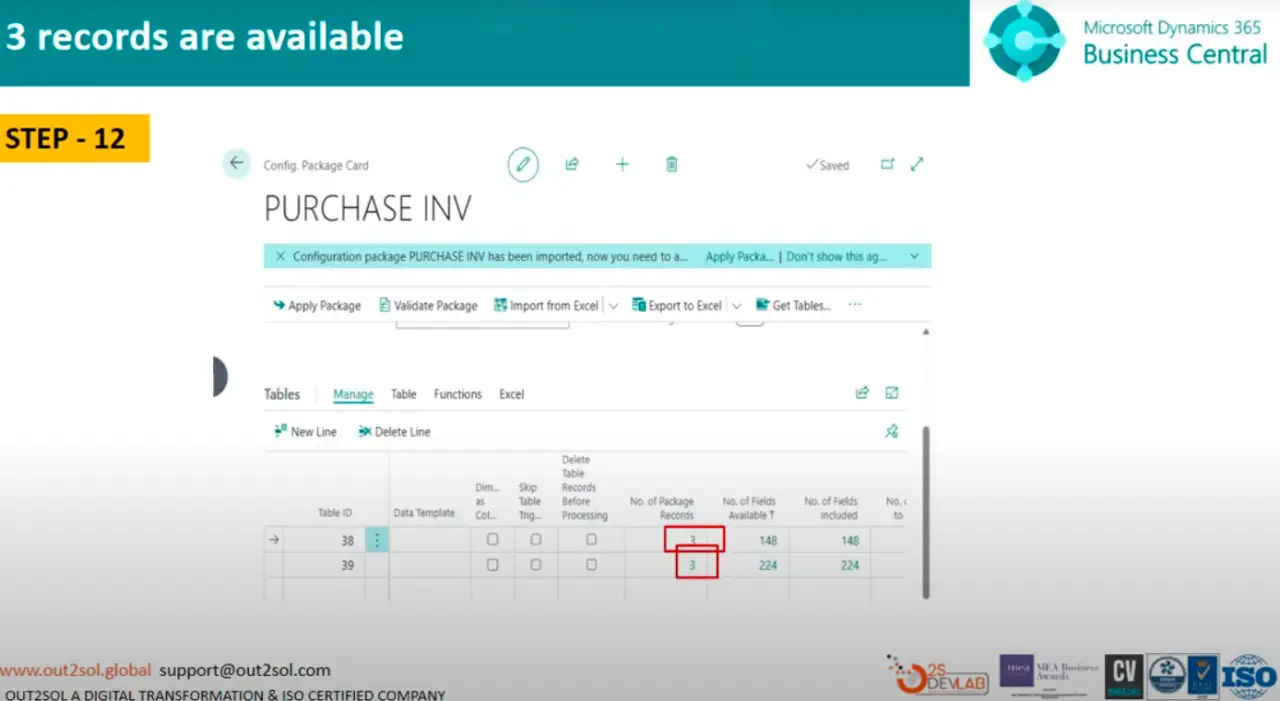
Step 12: Review Imported Records
A message will confirm something like:
3 records are available.
Check the details to ensure your imported data looks correct before applying it.
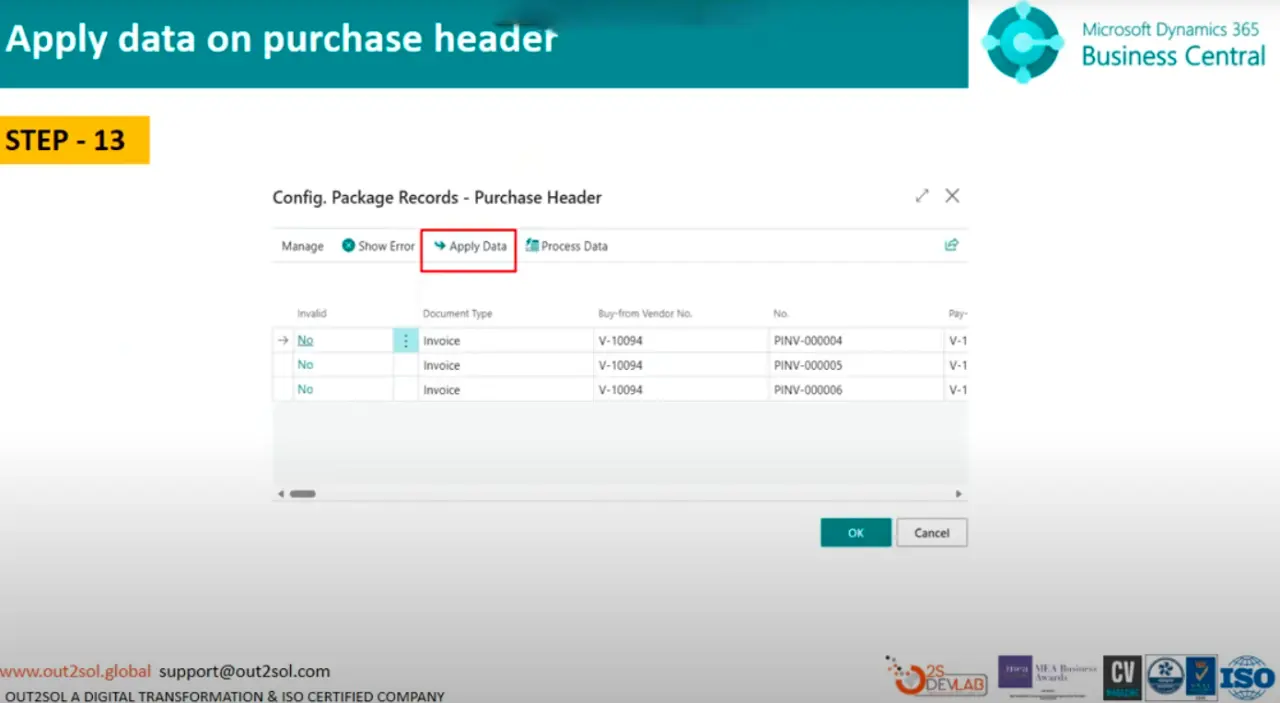
Step 13: Apply Data to Purchase Header
Select Apply Data on the Purchase Header section, then click OK.
This step will map and insert the data into your database.
Step 14: Apply Data to Purchase Line
Repeat the process,select Apply Data for Purchase Line, then click OK.

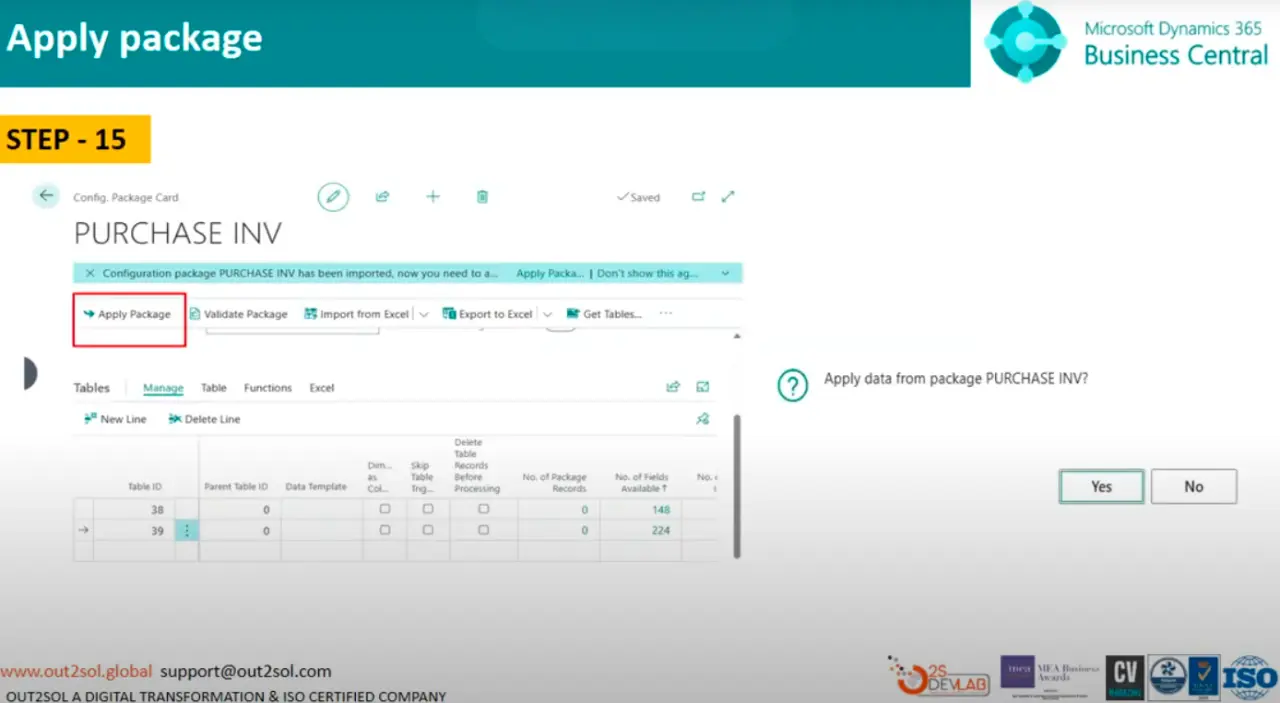
Step 15: Apply the Package
Now click Apply Package.
You'll see a pop-up message:
Apply data from package INV in purchase line.
Click Yes to confirm.
This applies your imported data to the respective tables.
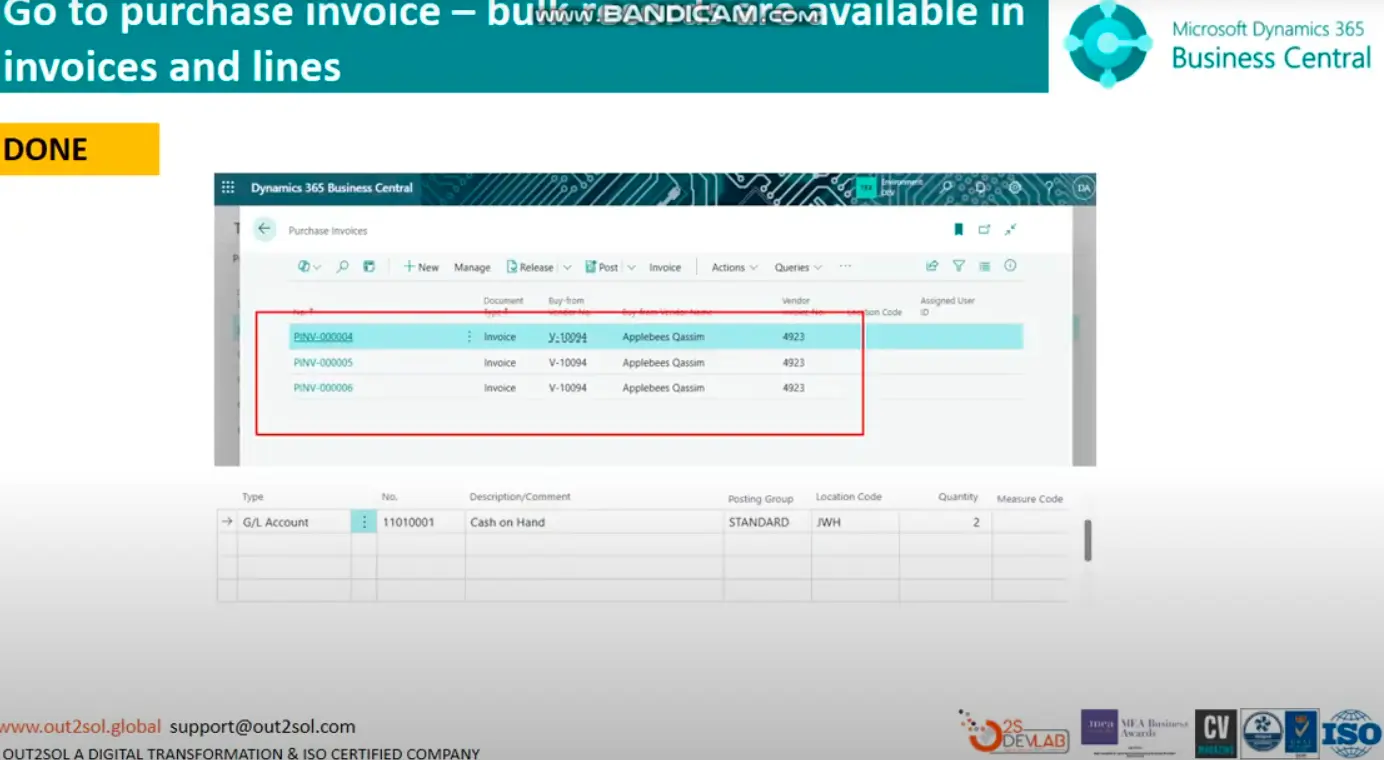
Step 16: Verify the Imported Data
Finally, navigate to Purchase Invoices. You'll see that your bulk records are successfully available in invoices and lines.
Tip: Always review your imported records and run a quick test transaction to confirm the data behaves correctly.
Practical Tips and Tricks
- Backup before import: Always back up your company data before applying packages.
- Use small test packages: Test with 2–3 records before large imports.
- Validate fields first: Use the validation feature to catch mapping errors early.
- Keep Excel clean: Avoid formulas, merged cells, or hidden columns in your Excel sheet.
- Save templates: Reuse configuration packages for recurring imports.
Final Notes
You've now learned how to import data using configuration packages in D365 Business Central, from creating the package to applying it and verifying results.
In our next session, we'll continue exploring How to Connect Your Business Central with Visual Studio. Until then, practice these steps with your sample data and note down any issues you encounter, we'll discuss them together in the next class.
Disclaimer: All logos, trademarks, and brand names used in this document are the property of their respective owners. Their use here is for identification purposes only and does not imply endorsement.


Your choice regarding cookies on this site
Policy, By Continuing, You are agreeing to Our Terms of Use and Consenting to the above.
Privacy Policy Powered By | ![]()


